This post was written for the 1.0.0 version of the game. Dragonsweeper has since been updated, and thus the information in this guide may no longer be accurate.
I’ve been playing Minesweeper casually for several years now, and recently it’s been the only video game I actually play. That is, until Dragonsweeper appeared on HN.
Dragonsweeper builds on top of the Minesweeper formula and improves it in pretty much every single aspect.
-
The skill floor is slightly increased from Minesweeper. I like this because I actually get a chance to use my brain more as opposed to Minesweeper, where you can sweep yourself into a corner with knowledge of the few most common patterns. Minesweeper can very easily be played while turning your brain off, which is not the case for Dragonsweeper.
-
Each Dragonsweeper board is solvable, or at least feels so. At some point while playing Minesweeper, you’ll run into a situation where you have to guess where a mine is in order to proceed, and if you guess wrong, you’re back to the beginning. The RNG in Dragonsweeper is kept to a reasonable amount, and doesn’t affect the gameplay the way it does in Minesweeper. For the most part, there is always a good, “safe” move you can play at any point in the game, without having to guess and bet your entire run on one single tile.
Game Guide
The provided Monsternomicon lists 5 rules:
- Jorge must defeat dragon
- Safe to use all hearts (ie. your hearts can go to 0 without dying, only when you go below 0 will you die.)
- Observe patterns when dead
- Right click to mark
- Similar to Minesweeper, but you’re allowed to mark numbers 1-10 as well as X.
- Numbers are the sum of monster level
There are 15 monsters in total. The Monsternomicon does not describe them in any detail other than their appearance, level, and quantity. As per rule 3, you’re supposed to infer the monster mechanics through observation. Luckily, you don’t have to do this since I’ll be listing everything I know in this post.
The “level” of a monster refers to how many hearts it requires to kill. Killing a monster will drop XP (shown below the health bar). Filling the bar will allow you to level up, restoring all your hearts as well as increasing the number of hearts you have (up to 17). This allows you to kill stronger monsters, and eventually the dragon.
XP obtained after your XP bar is full will roll over to the next level. It is safe to claim any extra experience (eg. via chests or blocks) when your XP is full.
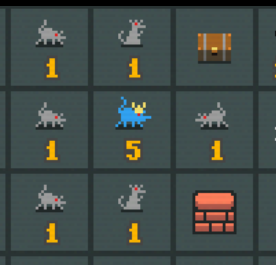
Rats
The rat sprite is always oriented in the direction of the rat king.
4 rats always surround the rat king.
Bats
Nothing special?
Skeletons
Nothing special?
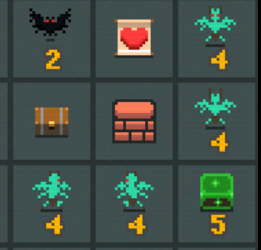
Gargoyles
Gargoyles always spawn in pairs. Gargoyles will always look at their partner. You can use this to your advantage.
Killing a gargoyle will not change the sprite of its partner.
Slimes
Killing the wizard will drop a slime scroll, revealing the position of all slimes (big or small).
Snakes
Nothing special?
Minotaurs
Nothing special?
Big Slimes
All 5 big slimes will spawn around the wizard. The wizard will always spawn on the edge of the board, but never in the corner.
It is very easy to find the big slimes since you’ll start seeing very high numbers that aren’t common or possible with any other monster combination.
Lich
There is only one lich, and it always spawns in one of the four corners of the board.
Killing the lich will drop a mine scroll, which will deactivate all mines on the board, turning them into XP.
It is safe to click on a tile with a known deactivated mine underneath it. It costs 0 hearts and simply reveals XP.
Deactivated mines no longer contribute to the number shown on a revealed tile (eg. 101 -> 1).
Rat King
The rat king is always surrounded by 4 rats (and thus it cannot spawn on the edges of the board?).
Killing the rat king will drop a rat scroll, which, similar to the slime scroll, will reveal all rats on the board.
Gazes
There are always 2 gazes on the board. The Monsternomicon does not mention this.
Gazes will replace the value of all revealed tiles within its influence with a question mark.
Gazes influence the 12 tiles surrounding it, in a star pattern.
You can use this pattern to pinpoint the location of the gaze.
Question mark tiles make it impossible to know what monsters are nearby, so getting rid of gazes is very important.
Wizard
The wizard will always spawn on the edge of the board (but never in the corner), surrounded by big slimes.
Killing the wizard will drop a slime scroll, which reveals all slimes (big or small).
Mimic
When a mimic tile is clicked, it will show up as a closed chest. Only when you click the mimic again will it open and deal damage.
Mimics add to a revealed tile’s sum. This way, you can be sure whether you’re clicking a real chest or not.
Mines
Mines are unkillable without the mine scroll.
Mines function similar to gazes, poisoning the area around them which high sums, making it impossible to take random guesses.
You can use regular minesweeper patterns to help in finding mines.
Gnome(?)
There is one gnome on the board, which must be killed twice. The gnome requires 0 hearts to kill though.
The first kill will drop nothing, while the second kill will drop 10 XP.
I’ve had games where I only need to kill the gnome once though.
Strategy
This strategy is written with the goal of full-clearing the board. The dragon can be killed before a full clear, but at that point you’ve already solved most of the board anyway.
Early Game
The early game is probably the hardest part of the game, but is still very much doable. It’s only hard in that running out of hearts without any good moves left is a realistic situation. This is more of an RNG thing rather than a skill issue.
The goal of the early game is to explore. The slime, rat, and orb scrolls are at their most valuable during the early game, when most of the board is hidden. Finding free XP via chests also helps your early-game fragility.
Make the most out of what little hearts you have. Always use up all your hearts before healing or levelling up. Prioritize killing monsters that will guarantee knowledge of at least one other tile.
If you don’t have any good moves, hit blocks as a last resort. For the most part, you can beat the game without ever touching a block.
Mark the location of mines. They will come in handy later.
Mid-Game (Pre-Lich)
The mid game is very similar to the early game. At this point, you should have cleared a good amount of the board, and have found the wizard and rat king. The goal of the mid game is to find the lich.
You should have found most of the mines during this phase.
Late-Game (Post-Lich)
Once you kill the lich, the board becomes solvable. Killing the lich grants a huge amount of XP (11 from the lich itself, 18 from the mines). Always prefer using level-ups to heal rather than using heart scrolls. Level-ups are the more potent heal as they give you an extra heart, and make heart scrolls more valuable later on since you now have more health.
End Game
The end game is just you clearing the board. Kill high-level monsters before lower-level ones. This ensures that you will have enough health toward the end of the game to take out stragglers.
After killing all the monsters, you should have at least 1 heart scroll left with which to break all the blocks. These will grant XP, which after levelling up, will heal you one final time to kill the dragon for a full clear.